Showing posts with label Recipe of the Day. Show all posts

April 1, 2009

Recipe of the Day - Lemon Thyme Cream Puffs


I'm on a big lemon kick lately, which is slightly weird because generally, I'm not a huge fan of lemons. But the past few weeks, I can't seem to get enough of them, whether it comes in the form of a cocktail or dessert. Must be my Spring fever coming out.

So, I'm happy to share today's Recipe of the Day - Lemon Thyme Cream Puffs. You can't really go wrong when you eat something that contains the words "cream" and "puff," but now I believe I have to add "lemon" to that list.


"Mary Ann has lemon fever" Lemon Thyme Cream Puffs Recipe

Equipment:
Measuring spoons
Measuring cups
Cooling rack
Parchment paper
2 baking sheets
Mixing bowls
Rolling pin
Saucepan
Sieve
Pastry bag w/ plain tip

Ingredients:
1/2 of a 17.3-ounce package Pepperidge Farm® Puff Pastry Sheets (1 sheet)
1 egg
1 tablespoon water
2 tablespoons sanding sugar *
1 cup heavy cream
3 large sprigs fresh thyme leaves
1/2 cup prepared lemon curd
4 ounces white chocolate, chopped

Thaw the pastry sheet at room temperature for 40 minutes or until it's easy to handle. Heat the oven to 400°F. Lightly grease or line 2 baking sheets with parchment paper. Beat the egg and water in a small bowl with a fork.

Unfold the pastry sheet on a lightly floured surface. Roll the pastry sheet into a 12-inch square. Brush with the egg mixture. Cut the pastry into 36 (2-inch) squares. Sprinkle with the sugar. Place the pastry squares onto the baking sheets.

Bake for 10 minutes or until the pastries are puffed and golden. Remove the pastries from the baking sheets and cool on wire racks.

Heat 1/3 cup cream and thyme sprigs in a 2-quart saucepan over medium heat to a boil. Reduce the heat to low and cook for 3 minutes. Remove from the heat and let the cream mixture steep for 30 minutes or until it cools to room temperature. Pour the cream mixture through a sieve. Discard the thyme. Refrigerate the cream mixture for 1 hour or until it's well chilled.

Beat the remaining cream in a large bowl with an electric mixer on high speed until soft peaks form. Add the chilled cream mixture and lemon curd. Beat until stiff peaks form. Spoon the cream mixture into a pastry bag fitted with a plain tip.

Pipe about about1 tablespoon lemon thyme cream mixture into each pastry puff.

Place the chocolate into a small microwavable bowl. Microwave on HIGH for about 1 minute. Stir until the chocolate is melted and smooth. Drizzle the chocolate over the pastry puffs. Let stand until the chocolate sets.

Serves 36.


Recipe from Puff Pastry.com.

March 27, 2009

Recipe of the Day - Raspberry Almond Breakfast Tart


Over the past two days, I've posted two out of the three winners of Pepperidge Farm's Puff Pastry to Paris contest - Chocolate Almond Raspberry Cannoli Shells and Candy Bar Puffs. Today, I'd like to present the final winner - Lisa Key's Raspberry Almond Breakfast Tart.


Raspberry Almond Breakfast Tart Recipe

Lisa Key's Description:
Easy and elegant this is a family favorite breakfast pastry reminescent of a local fancy French bakery. It can be served for brunch or even a dessert.

Equipment:
8-inch square baking pan
Measuring cups
Measuring spoons
Measuring spoons
Whisk
Cooling rack

Ingredients:
1 (12.5 oz.) package Pepperidge Farm Raspberry Turnovers
1/2 cup sugar
1/2 cup heavy cream
1 egg
1 teaspoon almond extract
1/2 cup sliced almonds
Powdered sugar, optional
Fresh raspberries and mint, optional


Heat oven 475F. Remove all wrapping. Arrange turnovers, in a single layer, in an ungreased 8-inch square baking dish with the pointed end of the turnovers toward the center of the pan. Place turnovers in oven.Immediately reduce temperature to 400 F. Bake 20 to 25 minutes or until outer edges of turnovers are golden brown.

Meanwhile, In small bowl, whisk sugar, heavy cream, egg and almond extract until well blended. Pour mixture over baked turnovers. Sprinkle evenly with almonds. Bake 20 to 25 minutes longer or until tart is a deep golden brown.

Cool 10 to 15 minutes. Serve warm cut into wedges. Dust with powdered sugar and garnish with fresh raspberries and mint, if desired.

Serves 4.

March 26, 2009

Recipe of the Day - Chocolate Almond Raspberry Cannoli Shells


Yesterday, I posted the first of three grand prize recipes from Pepperidge Farms' contest, Puff Pastry to Paris. Today's recipe is from the next grand prize winner, Aylin Tito, who offers us Chocolate Almond Raspeberry Cannoli Shells.


Chocolate Almond Raspberry Cannoli Shells Recipe

Alyin's Description:
This recipe combines some of our favorite dessert ingredients: Cannolis, raspberries & chocolate. I started off with just a basic cannoli in the puff pastry shell & then thought of ways to top it! After many combinations, this was our favorite! The flavors just work so well together & do not over power each other! Looks decadent & impressive, but does not feel heavy or overly sweet! Great balance with the flaky pastry!

Equipment:
Microwave
Mixing Spoons
Mixing Bowls
Cooling Rack

Ingredients:
1 package of (6) Pepperidge Farm Pastry Shells
1 cup whole milk ricotta cheese
1/3 cup powdered sugar
1 tsp. almond extract
1 candy bar (41grams) Dark Chocolate
1 10 ounce package of frozen raspberries in syrup, thawed
1 cup slivered almonds


Preheat oven to 400 Degrees. Place frozen shells on a cookie sheet lined with parchment paper ("Top" side up) & brush with an egg wash (1 egg & 1 Tsp water, beaten).

Bake for about 18-20 minutes until browned & puffed up.

In the meantime, shave off thin, small pieces of the chocolate bar using a vegetable peeler. You will need a total of 2 Tablespoons of the chocolate shavings. Set aside.

Then break up the rest of the chocolate bar in to smaller (approx. 1") pieces and place into a microwave safe bowl or cup.
Heat for 30 seconds and stir. Repeat until smooth completely melted.

Once the puff pastry shells are done, let rest 1 minute on a wire rack. Then using a teaspoon, carefully remove the "top" part of the shells & center pastry layers. Once the pastry shells have cooled, dip the tops of the shells (about 1" of the tops) into the melted chocolate & place back on the wire rack until the chocolate has hardened (about 15 minutes).

In the mean time, prepare the cannoli filling. Mix ricotta cheese with the powdered sugar and almond extract. Stir until well combined. Fold chocolate shavings into the cannoli cream until incorporated.

Fill the pastry cups with 2-3 Tablespoons of the cannoli filling, top with 1 tsp. of slivered almonds and 1 Tbs. of raspberries.
Garnish with additional almond slivers if desired.

Serves 6.

March 25, 2009

Recipe of the Day - Candy Bar Puffs


Over on PuffPastry.com, a site run by Pepperidge Farms, the winners of the Puff Pastry to Paris contest were just announced. The three Grand Prize winners will recieve a 7-day trip to Paris and $5,000 spending money. Pretty awesome, huh? Had I known about this contest earlier, I would have posted a note about it so all you readers could have submitted recipe ideas for a chance to win. Well, you'll just have to settle on making the winners' recipes instead.

Over the next three days, I'll be showcasing each winner's recipe. And now, I present the first of three Pepperidge Farm's Puff Pastry to Paris contest winners - Dan Rensberger. His recipe for Candy Bar Puffs is today's Recipe of the Day!


Candy Bar Puffs Recipe

Dan's Description:
I have served these at many family gathering as well at church functions and Red Cross functions for which I have made desserts. I always get raves about these puffs and everyone never knows how easy they are to make. I use so much puff pastry for these and many other recipes that I buy the puff pastry by the case at a restaurant supply company. I have made many of the recipes listed on your website and even gave an informal class on the use of puff pastry (from appetizers to main dishes to desserts) for a group from my church.

Equipment:
Mini muffin tins
Cooling Rack

Ingredients:
3 Sheets Puff Pastry Sheets
36 to 48 Miniature candy bars such as Milky Way, Snickers or 3 Musketeers
2 ounces Melting Chocolate (Milk, Dark or White)

Preheat oven to 375 degrees F. Thaw pastry sheets.

Cut pastry sheets into 2 inch squares. Place miniature candy bar top down on pastry square. Fold corners up to center. Seal all seams thoroughly (candy will leak out if not completely sealed).

Place wrapped candy seam side down in mini muffin tins that have been lightly sprayed with a quick release spray. Bake puffs for 10 to 12 minutes, until puffy and slightly browned.

Remove from oven, allow to cool slightly then remove from pan to finish cooling. When puffs are cool, melt chocolate and drizzle over the tops.

These puffs are slightly fragile, but can be frozen for 1 to 2 months.

Serves 6.

March 24, 2009

Recipe of the Day - Mint Chocolate Cheesecake


I recently started using a new shampoo that has a distinct minty smell. And let me tell you, when that shampoo bottle bares the slogan "Guaranteed to wake you up!", they aren't kidding. That tingly mint really gets you going in the morning. Plus, you smell like a peppermint candy at first thing in the morning, and by my calculations, that's never a bad thing. If they could figure out a way to bottle the scent of orange Tic-Tacs in perfume form, I'd be all set.

It's my new minty shampoo that has inspired today's Recipe of the Day choice. So, as you take your first bite of this mint chocolate cheesecake, thing of my superb scalp and my wonderful morning shower ritual. Appetizing, no?


"If you licked my head, it would taste just this cheesecake" Mint Chocolate Cheesecake Recipe

Equipment:
9-inch springform pan
Electric mixer
Mixing bowls
Measuring cups
Measuring spoons
Cooling rack

Ingredients:
1 1/2 cups finely crushed Oreo cookies (about 18)
3 Tablespoons butter, melted
3 (8 oz.) packages cream cheese, softened
1 (14 oz.) can condensed milk (not evaporated)
3 eggs
3/4 teaspoon peppermint extract
1/4 tsp. green food coloring (optional )
1 cup mini semi-sweet chocolate chips
1 teaspoon flour


Preheat oven to 300 degrees F. Combine cookie crumbs and butter. Press firmly on bottom of 9-inch springform pan.

In large mixer bowl beat cream cheese until fluffy. Gradually beat in sweetened condensed milk until smooth. Add eggs, peppermint, and food coloring; mix well.

In small bowl, toss 1/2 chips with flour to coat; stir into cheese mixture. Pour into prepared pan. Sprinkle remaining 1/2 cup chips evenly over top. Bake 1 hour or until cake springs back when lightly touched.

Cool to room temperature. Chill about 4 hours.

Recipe courtesy of MomsWhoThink.com.

March 20, 2009

Recipe of the Day - Wrapped Pears with Vanilla Bean Sauce


I'm not going to lie - the only reason this dessert caught my eye is that earlier this afternoon, i was at Crate and Barrel and saw a giant pear that was supposed to serve as a table decoration. I thought it looked cool and for the rest of the day, I've had pear on the brains.

Lucky for us, the folks over at Pepperidge Farms, the geniuses behind the Goldfish Cracker, came up with this tasty little number - a pear wrapped in dough. It's good for you because it's fruit! (sort of...)

Happy Friday!


"It's Friday and I'm not feeling all that creative" Wrapped Pears with Vanilla Bean Sauce Recipe

Equipment:
Saucepan
Measuring cups
Measuring spoons
Mixing bowls
Wood spoon
Spatula
Baking sheet
Melon baller
Peeler

Ingredients:
3 cups water
3/4 cup sugar
1/2 vanilla bean, split
4 Bartlett or Bosc pears, cored and peeled*
1/2 cup heavy cream
1/2 of a 17.3-ounce package Pepperidge Farm® Puff Pastry Sheets (1 sheet)
cold water
Granulated sugar
fresh raspberry


Use a melon baller to core the pears from the bottom and remove the seeds. Peel the pears, leaving the stem intact. Cut a thin slice from the bottom of each pear so that it will stand upright.
Heat the water, sugar, and vanilla bean in a 2-quart saucepan over low heat, stirring occasionally, until the sugar is dissolved.

Add the pears and cook for 10 minutes or until the pears are tender, turning occasionally. Remove the pears from the sugar mixture. Cover and refrigerate for 1 hour or until the pears are cold.

Stir the cream into the sugar mixture. Cook and stir for 20 minutes or until the mixture boils and is reduced to about 3/4 cup. Remove the vanilla bean and scrape the seeds into the sauce.

Thaw the pastry sheet at room temperature for 40 minutes or until it's easy to handle. Heat the oven to 400°F. Line a baking sheet with parchment paper.

Unfold the pastry sheet on a lightly floured surface. Cut the pastry sheet crosswise into 8 (3/4-inch wide) strips. Brush the strips with the water and sprinkle with the sugar. For each pear, join 2 pastry strips by pressing the ends together. Wind 1 strip of pastry around each pear, tucking the end under the bottom of the pear. Place the wrapped pears onto the baking sheet. Loosely cover the wrapped pears with aluminum foil.

Bake for 25 minutes or until the pastries are golden. Spoon the vanilla sauce onto 4 plates. Top each with 1 pear and garnish with the raspberries.

March 19, 2009

Recipe of the Day - Coconut Cake


When I was growing up in Oklahoma City, my mother always shopped at Kamp's Grocery, a small locally owned grocery store that had been in Oklahoma City for ages. I loved going to Kamp's for numerous reasons, the main ones being that the butcher/deli person would always sneak us slices of cheddar cheese to snack on and that for some reason, my mom was a lot more open to the idea of purchasing Kool-Aid at Kamp's than she was at other grocery stores.

Another reason I looked forward to our Kamp's trips was the promise of my mom buying one of their coconut cakes. This cake was the type of treat you would think about for days after tasting it. No one could resist its charm, and I'm sure many coconut nay sayers were swayed to the other side by its amazing buttercream icing, adorned with flecks of fresh coconut.

Kamp's eventually closed, and as many things have done, that coconut cake was filed away as a casualty of an even bigger problem - the inability of "mom and pop" shops to keep their doors open as chain grocery stores and Wal-Mart pushed them out of the way. But I never forgot that cake, and neither did my family, especially my mom. Over the years, the Kamp's coconut cake would occasionally come up in conversation, with each of my family members recalling their favorite aspect of this bakery masterpiece. The conversation always ended with ,"God, that cakes was delicious - no one makes it like Kamp's."

Oh, there were cheap imitators that tried to win our affection. A constant parade of second-rate icings, stale coconut topping and crumbly cake passed over our palates, each bite reminding us how good we once had it. The Kamp's coconut cake was now a legend, right up there next to the Knights of the Roundtable and that theory that states if you say "Bloody Mary" three times in front of a bathroom mirror with the lights off, Bloody Mary herself (whomever that is), will appear.

A few years ago, I was perusing the Dean & Deluca catalog online. I was looking for something seasonal to send my mom for her birthday, and a few months earlier I had found some adorable Springtime cookies that I had ordered for both my parents and which they seemed to enjoy. Page after page led me to delicious gift options, but nothing was really jumping out at me as something my mom would appreciate for her birthday. Summer-themed cookies in the shape of bumblebees, flowers, beach balls, as well as beautiful fruit tarts and more paraded in front of me, but alas, nothing said "Mom."

And then I saw it. On the last page of the seasonal gift online section, it beckoned to me as only the most delicious cake in the world can. It was a coconut cake with buttercream icing - just like Kamp's used to make! No more cheap mousse as a substitute for buttercream! No more fruit filling instead of icing in between layers! I had found it! I had found the Kamp's coconut cake reincarnated!

And to prove to you how awesome this cake was, I can honestly say that my family ate the entire cake in less than a day and a half. We aren't a family of fat asses, but we know a good cake when we taste it.

Be sure to enjoy today's Recipe of the Day - it took what felt like a lifetime to rediscover.

"Don't ever leave my side again" Coconut Buttercream Cake

Ingredients:
Cake
Cooking spray
1 tablespoon cake flour
2 1/2 cups cake flour (about 10 ounces)
2 teaspoons baking powder
1/2 teaspoon salt
2 cups sugar
6 tablespoons butter, softened
1/4 cup egg substitute
2 large eggs
3/4 cup light coconut milk
1/4 teaspoon coconut extract

Frosting
1 cup sugar
1/4 cup water
5 large egg whites
1/2 teaspoon cream of tartar
1/8 teaspoon salt
1/4 cup butter, softened
1/4 teaspoon coconut extract (optional)
3 tablespoons toasted flaked sweetened coconut

Equipment:
3 8-inch round cake pans
Wax paper
Measuring bowls
Measuring spoons
Measuring cups
Whisk
Electric mixer
Cooling rack
Saucepan
Wooden spoon
Spatula
Cake stand (to use while icing the cake)

Preheat oven to 350°.

To prepare cake, coat 3 (8-inch) round cake pans with cooking spray; line bottoms of pans with wax paper. Lightly coat wax paper with cooking spray; dust pans with 1 tablespoon flour.

Lightly spoon 2 1/2 cups flour into dry measuring cups, and level with a knife. Combine flour, baking powder, and salt, stirring with a whisk. Place 2 cups sugar and 6 tablespoons butter in a large bowl; beat with a mixer at medium speed for 2 minutes or until well blended. Add egg substitute and eggs to sugar mixture; beat well. Add flour mixture and coconut milk alternately to sugar mixture, beginning and ending with flour mixture. Stir in 1/4 teaspoon extract.

Spoon batter into prepared pans. Sharply tap the pans once on countertop to remove air bubbles. Bake at 350° for 25 minutes or until a wooden pick inserted in the center comes out clean. Cool in pans 10 minutes on wire racks; remove from pans. Remove wax paper; discard. Cool cakes on wire racks.

To prepare frosting, combine 1 cup sugar and 1/4 cup water in a saucepan; bring to a boil. Cook 3 minutes, without stirring, or until a candy thermometer registers 250°. Combine egg whites, cream of tartar, and 1/8 teaspoon salt in a large bowl; using clean, dry beaters, beat with a mixer at high speed until foamy. Pour hot sugar syrup in a thin stream over egg whites, beating at high speed until stiff peaks form, about 3 minutes. Reduce mixer speed to low; continue beating until egg white mixture cools (about 12 minutes).

Beat 1/4 cup butter until light and fluffy; stir in 1/4 teaspoon extract, if desired. Fold in 1 cup egg white mixture. Fold butter mixture into remaining egg white mixture, stirring until smooth.

Place 1 cake layer on a plate; spread with 1 cup frosting. Repeat twice with cake layers and 1 cup frosting, ending with cake layer; spread remaining frosting over top and sides of cake. Sprinkle with toasted coconut. Chill until set.

March 18, 2009

Recipe of the Day - Crème Brûlée (plus, Puff and Choux's 100th post and prize give-away!)


Several years ago, my best friend Emily and I thought about starting up a zine, which some might consider the predecessor to the blog. We knew it had to have a niche topic, so we decided on sushi and the people we hated in high school. Those were two specific subjects that we felt we could write endless articles about. A couple of cocktails later, the zine idea went out the window and as an alternative, we just sat around and bitched about bad sushi and high school.

Fast forward to a year or two after the zine fall out. Emily and I were sharing some crème brûlée at the end of a birthday dinner in Williamsburg. The subject of starting a blog came up, and we decided that crème brûlée would be a great topic. However, once again, a few cocktails interfered and that idea was ditched and instead we just vowed to always order crème brûlée whenever we saw it on a dessert menu moving forward. And we have done so for the past four years.

So in honor of that fallen blog that never was, today's Recipe of the Day is for the Queen of Desserts (at least in my mind) - Crème Brûlée.

Also, this is Puff and Choux's 100th post, so to the first reader to post a comment in the comment section of this blog that includes the name and contact info for a restaurant in your area that serves crème brûlée, I'll send you a dessert gift card from said restaurant so you too can enjoy this amazing treat. Everyone else - make it yourself using the recipe from Debbie Puente and her website - CrèmeBrûlée.com!

Be sure to leave your name and e-mail address with your comment so I know how to get in touch with you regarding the gift card!

"Crème Brûlée - Make my Day" Recipe

Equipment:
6 Ramekins
Large pan for water bath (for use in oven)
Hand-held torch
Mixing bowls
Whisk
Sieve
Measuring cups
Measuring spoons

Ingredients:
8 egg yolks
1/3 cup granulated white sugar
2 cups heavy cream
1 teaspoon pure vanilla extract
1/4 cup granulated white sugar (for the caramelized tops)

Preheat oven to 300ºF. In a large bowl, whisk together egg yolks and sugar until the sugar has dissolved and the mixture is thick and pale yellow. Add cream and vanilla, and continue to whisk until well blended. Strain into a large bowl, skimming off any foam or bubbles.

Divide mixture among 6 ramekins or custard cups. Place ramekins in a water bath (large pan filled with 1 or 2 inches of hot water) and bake until set around the edges, but still loose in the center, about 50 to 60 minutes. Remove from oven and leave in the water bath until cooled. Remove cups from water bath and chill for at least 2 hours, or up to 2 days. When ready to serve, sprinkle about 2 teaspoons of sugar over each custard. For best results, use a small, hand-held torch to melt sugar. If you don't have a torch, place under the broiler until sugar melts. Re-chill custards for a few minutes before serving.

Serves 6.

March 17, 2009

Recipe of the Day - Irish Soda Bread


In honor of St. Patrick's Day, we are featuring a classic Irish baked good: Soda bread. Popular throughout Ireland and known for it's easy and quick recipe, I suggest you whip this up for tea this afternoon or evening and indulge in a little bit of St. Paddy's, other than the fifty gallons of green beer you've most likely already consumed...

"Time to Soak Up All That Green Beer" Irish Soda Bread Recipe

Equipment:
Sieve
Mixing bowls
Measuring spoons
Measuring cups
Spatula
Baking sheet
Clean tea-towel

Ingredients:
1lb/ 1/2kg/ 4 cups plain flour
1 tsp salt
1 tsp baking soda
1 tsp sugar (optional)
1pt/ 1/2 lr/ 2 cups buttermilk or sour milk

Sieve the dry ingredients into a large bowl. Scoop up handfuls and allow to drop back into the bowl to aerate the mixture. Add enough buttermilk to make a soft dough. Now work quickly as the buttermilk and soda are already reacting. Knead the dough lightly - too much handling will toughen it, while too little means it won't rise properly.

Form a round loaf about as thick as your fist. Place it on a lightly-floured baking sheet and cut a cross in the top with a floured knife. Put at once to bake near the top of a pre-heated oven, gas mark 8, 450°F, 230°C, for 30-45 minutes. When baked, the loaf will sound hollow when rapped on the bottom with your knuckles. Wrap immediately in a clean tea-towel to stop the crust hardening too much.

This recipe was taken from A Little Irish Cookbook by John Murphy.

March 16, 2009

Recipe of the Day - Pantry Cleaning Muffins (i.e. anything you got in the cupboard, throw it in the mixing bowl!)


When I first started this blog, it was out of my love and obsession over pastry and dessert. However, the side effect is that more and more people are starting to read Puff and Choux, including folks I haven't talked to in over ten years. My third grade teacher, my high school applied design teacher, etc. Another such person is Andrea, the oldest daughter of my mom's best friend. I haven't seen Andrea since I was around 14 or 15 years old, so I was super surprised when she commented on my blog for the first time. It's such a great feeling to reconnect with people like this, so it's not a stretch to say that Puff and Choux is a great addition to my life.

Andrea was kind enough to send along a recipe, which I'm happy to share as today's Recipe of the Day. This is probably one of my favorite recipes so far because of the idea of using everything in your fridge or pantry instead of letting things go to waste. When we're all looking for ways to cut down on our grocery bills, Andrea's recipe is a great reminder that most of the time, we already have items in our kitchen that we can use to whip up some delicious meals and treats. Keep in mind, you can substitute a lot of these ingredients, such as blueberries for the cranberries. And jot down Andrea's tips for other substitutions - she's got some great ideas!

Also, while you're waiting for these muffins to bake, be sure to check out Andrea's blog - A Shelf Full of Books. You'll end up with some great reading recommendations to enjoy alongside your muffins!


"Don't Even Think About Throwing Away That Container of (:: Insert Food Product Here ::) - We'll Make Muffins" Recipe

Equipment:
Muffin tins
Muffin wrappers (optional)
Mixing bowls
Measuring cups
Measuring spoons
Spatulas
Measuring spoons
Cooking rack

Ingredients:
1 1/4 cups whole wheat flour
1 1/4 cups oat bran
1 tsp baking powder
1/2 tsp baking soda
1/4 tsp salt
1 tsp cinnamon
1 cup plain yogurt
1/4 cup orange jam
1/2 cup low-fat buttermilk (I didn't have any buttermilk so I mixed 1/2 tbsp white vinegar with 1/2 cup skim milk)
1/2 cup firmly packed brown sugar
2 tbsp oil
1 large egg, lightly beaten
1 tsp. vanilla
1/4 tsp. orange water (found in Middle Eastern grocery stores)
1 cup frozen cranberries
1/3 cup coconut flakes


Preheat oven to 375 degrees. Line a muffin tin with paper cases or spray with nonstick cooking spray.

In a large bowl combine flour, oat bran, baking powder, baking soda, salt and cinnamon. In a medium bowl combine yogurt, jam, buttermilk, sugar, oil, egg, and extracts. Make a well in dry ingredients and add wet mixture. Stir until just moist. Fold in berries and coconut. Fill muffin cups 2/3- over- full. This made a dozen.

Bake for 16-18 minutes.

March 13, 2009

Recipe of the Day - Clover Sugar Cookies (Irishmen: Don't worry, I haven't forgotten you!)


Even though today was dedicated to Easter recipes (as mentioned, I wanted to give you all plenty of time to try out these different recipes before the actual holiday), I haven't forgotten one of the most celebrated events of the year: St. Patrick's Day.

Honestly, when I (and I would venture to day the entire rest of the world) think of St. Patrick's Day, I don't really think of food. I think of green beer, crowded pubs and every bar in New York City playing the Pogues, U2, or the Cranberries. But for those of you that are thinking ahead and understand the importance of lining your stomach prior to an all-out booze fest, today's Recipe of the Day is for you - Clover Sugar Cookies.

I am willing to GUARANTEE that if you whip up these bad boys and pass them out to your fellow revelers next Tuesday, you will be the hit of the party and will probably score some free beer. If you happen to undertake this challenge, be sure to e-mail me your photos at puffandchoux@gmail.com - I'd love to post photos of some crazy Irishmen indulging in your baked goods!

Luck of the Irish Clover Cookies Recipe

Equipment:
Electric Mixer
Sifter
3-inch cookie cutter round
Clover template
Cookie sheet
Parchment paper
Measuring cups
Measuring spoons
Cooking rack

Ingredients:
4 cups sifted all-purpose flour, plus more for dusting
1/2 teaspoon salt
1 teaspoon baking powder
1 cup (2 sticks) unsalted butter
2 cups granulated sugar
2 large eggs
2 teaspoons pure vanilla extract
Green sanding sugar


Sift together flour, salt, and baking powder into a large bowl; set aside. Combine butter and granulated sugar in the bowl of an electric mixer fitted with paddle attachment; cream on high speed until fluffy. Beat in eggs.

Reduce mixer speed to low. Add flour mixture in two additions, mixing until well combined. Mix in vanilla. Divide dough in half, and cover with plastic wrap; refrigerate 30 minutes.

Preheat oven to 350 degrees. Roll out 1 piece of dough on a lightly floured work surface 1/8 inch thick. With a 3-inch cookie cutter, cut out 25 rounds. Working with 1 round at a time, place clover stencil on top; sprinkle surface with sanding sugar.

Arrange rounds on parchment- or nonstick baking mat-lined baking sheets. Refrigerate until firm, about 15 minutes, or until ready to bake. Repeat process with remaining dough.

Bake, one sheet at a time, until edges just start to brown, 10 to 12 minutes. Let cool completely on sheets on wire racks. Store cookies in an airtight container for up to 5 days.

This recipe makes 50 cookies.

March 12, 2009

Recipe of the Day - Key Lime Pie


While at the grocery store yesterday, I realized that I have never once in my life bought limes. I wondered if the lack of limes in my life (say that 10 times fast!) was somewhat on purpose - I have happily brought home oranges, grapefruits, lemons, nectarines, the list goes on, but alas, no limes.

I began to fill guilty. This particular grocery store visit was to stock up on lemons as I was preparing to make a lemon tart that evening. As my ripe, 2 for dollar tart ingredients shown brightly from my cart, I looked longingly over my shoulder at the limes. For a second, I swear one or two looked abandoned. It was at that point, that I marched right over to the crate containing the limes and proudly plucked two from the pile. "I thought about you every day" I mentally whispered (and lied) to my new friends. I'm now staring at two limes nesting lazily on my countertop. Wait...am I imagining things or has that original look of limey loneliness now turned to smug satisfaction? Don't test me limes! I'll buy a six pack of Corona and you'll see who is boss! Just watch me.

I like to think that the fact I'm giving fruit human characteristics is because my sleep schedule is out of whack this week and I'm quite tired. It's either that, or my love of cooking has finally gone too far. My new mantra is this: You eat food. You don't befriend food. You eat food. You don't cuddle it.

So, in honor of all the friendless limes in the world, today's Recipe of the Day is Key Lime Pie. I'm watching you limes!

"Stop playing with my emotions, you damn limes" Key Lime Pie Recipe

Equipment:
9-inch pie pan
Zester
Whisk
Mixing bowls
Measuring cups
Measuring spoons
Food processor
Cooling rack

Ingredients:
1/2 cup fresh lime juice (3 to 4 limes)
4 teaspoons grated lime zest
4 egg yolks
1 - 14 ounce can sweetened condensed milk
11 graham crackers
3 tablespoons granulated sugar
5 tablespoons unsalted butter, melted


Preheat oven to 325 degrees.

It's easier to remove the lime zest from whole limes so I would start with that. Then I would cut the limes in half and squeeze out the juice being careful not to include any pits.

Process the graham crackers in a food processor or blender and then melt the butter and have it at the ready.

Whisk the egg yolks and lime zest together in a bowl until tinted light green. This takes about 2 minutes. Beat in milk, then juice and set aside at room temperature till it thickens.

Mix graham cracker crumbs and sugar in another bowl. Add butter and stir with a fork until well blended. Pour this mixture into a 9-inch pie pan and press over the bottom and up the sides of the pan. Try using the bottom of a measuring cup to make sure the graham cracker mixture forms a firm crust on the bottom of the pie pan.

Bake on the center rack for about 15 minutes until the crust is lightly brown, remove and let cool to room temperature.

Pour the lime filling into crust, spread evenly, and then bake for 15 minutes until the center sets, but still wiggles when shaken.

Remove from oven and cool to room temperature.

Refrigerate for at least three hours until well chilled.

March 11, 2009

Recipe of the Day - Creamy Caramel Pudding


I've hit that point in the winter where Spring keeps teasing me with somewhat warmer temperatures, only to drop down into the freezing range once the afternoon rolls around. I'm ready for lightweight trench coats and bare legs - I'm tired of tights and leggings. And socks too. Let the sandal wearing commence!

But to keep warm during these last few weeks of winter, I found this delicious caramel pudding recipe. Put this on the stove, dish up, and watch while eating the Biggest Loser, because hey - those people still haven't hit their goal weights yet so we all can still feel a bit slimmer.

It's Not Quite Spring Yet, So Let's Break Out the Creamy Caramel Pudding Recipe

Equipment:
Measuring cups
Measuring spoons
Mixing bowls
Large suacepan
Whisk
Fine strainer
8 1/2-cup ramekins

Ingredients:
1 quart 2-percent milk
1/4 cup plus 3 tablespoons cornstarch
2 teaspoons pure vanilla extract
Pinch of salt
2 cups sugar
Nut brittle, for serving (optional)


In a small bowl, whisk 1/2 cup of the milk with the cornstarch, vanilla and salt until smooth. In a large saucepan, combine the sugar with 1/4 cup plus 2 tablespoons of water and bring to a boil. Cook over moderately high heat, undisturbed, until a deep amber caramel forms, about 8 minutes. Remove from the heat. Very gradually whisk in the remaining 3 1/2 cups of milk, 1/4 cup at a time. Whisk over moderate heat until the caramel has dissolved. Simmer over moderately low heat until the mixture thickens slightly and deepens in color, about 10 minutes. Remove from the heat.

Gradually whisk the cornstarch mixture into the caramel. Cook over moderate heat, stirring, until the pudding is very thick, about 1 minute. Strain the pudding through a fine strainer set over a large measuring cup. Scrape the pudding into eight 1/2-cup ramekins and refrigerate until chilled, about 2 hours. Garnish with nut brittle, if desired.

The pudding can be refrigerated for up to 2 days.

March 10, 2009

Recipe of the Day - Chocolate Cake in a Mug


I like to think of my friend Ryoko as my food soul mate i.e. we both have the most amazing sense of taste I've ever encountered...not to brag or anything...

Ryoko and I have shared many tasty treats together over the past few years, so I was delighted when she sent me this little recipe for Chocolate Cake in a Mug. In her note, Ryoko reminded me of something - cooking is supposed to be fun. So regardless of whether this is the most gourmet, fancy pancy chocolate cake you've ever whipped up in your kitchen or the cheapest thing your since those corn dogs you bought six months ago, it's fun. I think a lot of people forget about this fundamental idea of cooking being enjoyable, so I hope Ryoko's recipe reminds you of this fact. As Ryoko says, I can't think of a faster, more satisfying solution for those cake cravings we all get sometimes.


Ryoko's "I don't care if you have a culinary degree - this recipe is fun" Chocolate Cake in a Mug Recipe

Equipment:
1 Coffee Mug
Measuring spoons

Ingredients:
4 tablespoons flour (that's plain flour, not self-rising)
4 tablespoons sugar
2 tablespoons baking cocoa
1 egg
3 tablespoons milk
3 tablespoons oil
3 tablespoons chocolate chips (optional)
Some nuts (optional)
Small splash of vanilla


Add dry ingredients to mug, and mix well. Add the egg and mix thoroughly.

Pour in the milk and oil and mix well.

Add the chocolate chips (if using) and vanilla, and mix again.

Put your mug in the microwave and cook for 3 minutes on high. The cake

will rise over the top of the mug, but don't be alarmed!

Allow to cool a little, and tip out onto a plate if desired.

Eat!

March 9, 2009

Recipe of the Day - Cajun Macaroons


As mentioned in the previous post, we're celebrating Gourmet's almost seven decades of cookie recipes with one of the first cookie recipes to be included in the magazine. In the February 1941 issue, the editors decided to include a special Mardi Gras menu from Louisiana, including a recipe for Cajun Macaroons. Described as "crisp and chewy, with a subtle almond scent" are French-style, but not in the traditional macaron style I typically focus on with this blog.

So, let's tip our hats to Louisiana and warm up our ovens for today's Recipe of the Day!

Gourmet's Cajun Macaroons

Equipment:
Wooden spoon
Various sized mixing bowls
Cookie sheet(s)
Parchment paper
Pastry bag (optional, for cooking shaping)
Flour sifter
Measuring cups
Measuring spoons
Spatula
Cooling Rack

Ingredients:
1/2 lb. almond paste
3 egg whites
1/2 cup sifted pastry flour
1/2 cup fine granulated sugar
1/2 cup of powered sugar

Work 1/2 lb. almond paste with a wooden spoon until it is smooth. Add 3 slightly beaten egg whites and blend thoroughly. Add 1/2 cup sifted pastry flour, resifted with 1/2 cup fine granulated sugar and 1/2 cup powdered sugar. Cover a cookie sheet or sheets with bond paper. The cooky mixture may be dropped from the tip of a teaspoon and shaped on the paper, or may be pressed through a cooky press, or shaped with a pastry bag and tube. Bake in a slow oven (300°F.) about 30 minutes. The cakes may be removed from the paper by means of a spatula while still warm.

Variations: Finely chopped or ground candied fruits may be added to the mixture before baking. Or the tops of the macaroons may be decorated before baking by placing in the center of each a nut half, a raisin (seedless, black or white), or a bit of candied fruit–such as a bit of angelica–cut fancifully, or by sprinkling with finely chopped nut meats. The cakes may be decorated after baking by dainty frosting designs formed with the help of a cake decorator or a pastry tube.

Recipe yields 4 dozen 1 1/2 inches in diameter.

These should be baked a few days in advance. They will keep several months when kept in a closed tin in a cool, dry place.

March 6, 2009

Recipe of the Day - Cranberry Panna Cotta


If you aren't one for baking but love a nice dessert that is simple and easy to make (minus an oven), then this Cranberry Panna Cotta is for you. This healthy dessert only requires five ingredients and can be kept in the fridge for up to 3 days. This means you can make this dish ahead of time and be able to relax and enjoy your guests!

Cranberry Panna Cotta: Why Notta? Recipe

Equipment:
Small saucepans
Wooden spoon
Regular spoon
Large mixing bowl
Spatula
Measuring cups
Measuring spoons
8 glasses (for serving)

Ingredients:
1 cup fresh or frozen cranberries
1/4 cup plus 2 tablespoons sugar
2 tablespoons water
3 1/2 cups low-fat buttermilk
1 tablespoon plus 1/2 teaspoon unflavored powdered gelatin
Plain low-fat yogurt and candied rose petals, for serving

In a small saucepan, combine the cranberries with the sugar and water and bring to a boil. Simmer over moderate heat, stirring occasionally, until the cranberries soften, about 5 minutes. Mash the cranberries with the back of a spoon to make a thick sauce. Transfer the sauce to a large bowl and refrigerate, stirring often, until cool, about 15 minutes. Stir 3 cups of the buttermilk into the cooled cranberry sauce.

In a small saucepan, sprinkle the gelatin over the remaining 1/2 cup of buttermilk. Let stand until the gelatin has dissolved, about 5 minutes. Heat the mixture over low heat, stirring a few times with a rubber spatula, until the buttermilk is just warm and the gelatin is melted, about 1 1/2 minutes; fold into the cranberry mixture.

Pour the panna cotta into 8 glasses. Cover and refrigerate for about 2 hours, until they are set. Top each with a small dollop of yogurt and a few candied rose petals and serve.

March 5, 2009

Recipe of the Day - Honeyed Yogurt and Blueberry Tart with Ginger Crust


I've been on a massive blueberry kick lately. I love to buy cartons of this little berry and eat them alone as a snack or pretty much in any dish that is put in front of me. I'm also a fan of blueberry-infused dessert wine. Seriously, I can't get enough of this berry (side note: Although I love blueberries, raspberries are still my fav berry).

So to celebrate this delicious little treat, try out today's recipe. I think that had she made it past Willy Wonka's chocolate factory, Ms. Violet Beauregarde would have loved this blueberry dish much more than what her fate prescribed...

Violet Beauregarde's Adult Weakness a.k.a Honeyed Yogurt and Blueberry Tart with Ginger Crust

Equipment:
14 x 4.5-inch rectangular fluted tart pan (with removable bottom)
Food processor
Measuring cups
Measuring spoons
Spatula
Medium mixing bowl
Cooling Rack

Ingredients:
10 whole graham crackers, broken into pieces, or 1 1/2 cups plus 2 1/2 tablespoons of crumbs
1/4 cup crystallized ginger, finely chopped
1 tablespoon sugar
Pinch of salt
3 tablespoons unsalted butter, melted
1 large egg white
2 cups Greek-style nonfat yogurt, drained overnight
2 tablespoons honey
1 1/2 cups blueberries (9 ounces)

Preheat the oven to 350°. Spray a 14-by-4 1/2-inch rectangular fluted tart pan with a removable bottom with cooking spray. In a food processor, pulse the graham crackers with the crystallized ginger, sugar and salt until finely ground. Add the butter and egg white and pulse until the crumbs are evenly coated. Press the crumbs evenly over the bottom and up the sides of the tart pan. Bake for about 20 minutes, until the crust is lightly browned. Let the crust cool completely.

In a medium bowl, mix the drained yogurt with the honey. Spread the yogurt in the crust and arrange the blueberries over the surface of the yogurt. Cut the tart in slices and serve.

In case you want to make the crust ahead of time, the baked crust can be wrapped in plastic and kept at room temperature overnight.

March 4, 2009

Recipe of the Day - Orange Honey Cake with Lavender Whipped Cream


My amazingly awesome pal Mickey was kind of enough to send in today's Recipe of the Day, all the way from Los Angeles, California. Mickey is known for his amazing creative mind, so he sent along a disclaimer for this dish - he usually cooks on the fly so it's best to use your common baking sense when working this recipe out.

Now enjoy a little bit of sunshine from the California coast!

Mickey's "I Ain't Yo Honey - You a Scrub!" Orange Honey Cake

Equipment
9-inch-diameter springform pan
Mixing bowls
Measuring cups
Measuring spoons
Spatula
Small saucepan
Electrix hand mixer
Strainer
Cooling rack

Ingredients
Orange Honey Cake:
Nonstick olive oil spray
1.5 cup all purpose flour
1.5 tablespoon baking powder
1 cups sugar
Half bottle of honey
Half cup of coffee (cooled)
2-3 tablespoon finely grated orange peel
1/2 cup olive oil

Lavender Whipped Cream:
1 cup whipping cream
1 tsp. dried lavender, crushed
2 Tbsp. superfine granulated sugar

Preheat oven to 350°F. Spray 9-inch-diameter springform pan with nonstick olive oil spray or just brush it all with olive oil.

Mix flour and baking powder in medium bowl. Set aside.

Using an electric mixer, beat eggs in large bowl until frothy, about 2 minutes. Gradually add sugar, beating until light, thick, and pale yellow, about 4 minutes. Gradually add flour mixture; coffee, orange peel, honey, and olive oil, beating just until blended. Transfer batter to prepared pan. Place pan on rimmed baking sheet, and bake cake until toothpick inserted into center comes out clean, about 1 hour. Cool cake completely in pan on cooling rack.

Make lavender whipped cream. In a small saucepan combine whipping cream and dried lavender. Bring to just a simmer. Remove from heat. Strain mixture and discard lavender. Cover and chill whipped cream mixture at least 2 hours or until completely chilled.

In a chilled metal mixing bowl beat whipping cream and sugar with an electric mixer on medium speed, beating just until soft peaks form. Use at once or cover and chill up to 2 hours. Serve with fresh berries. Makes 16 (2 tablespoon) servings.

March 3, 2009

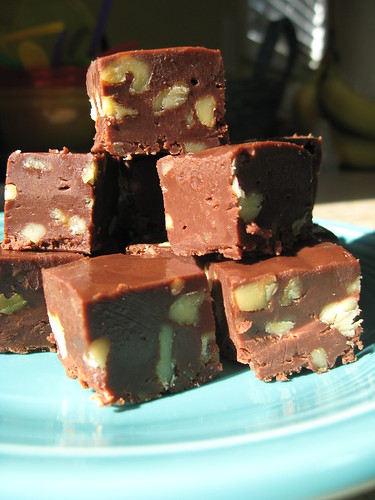
Recipe of the Day - Mary Mitchell Luman's (my Granny) Fantastic Fudge


As mentioned in yesterday's post, today's recipe is from the kitchen of my beloved Granny. She made this fudge every year until she was too ill to manage, but thank god for the Kraft Food Company - HER recipe will live on forever.

Granny's Secret Fudge Recipe

Equipment:
1 large saucepan
9-inch square foil baking pan
Measuring cups
Measuring spoons
Wooden spoon
Spatula
Cooling rack
Cutting board
Candy thermometer

Ingredients:
3 cups of sugar
3/4 cup (1.5 sticks) of butter or margarine
1 small can (5 oz.) of evaporated milk
1 1/2 pkg. (12 squares) Baker's Semi-Sweet Baking Chocolate, chopped
1 jar (7 oz.) Jet-Puffed Marshmallow Creme
1 cup chopped Walnuts
1 tsp. vanilla

Place sugar, butter and evaporated milk in large heavy saucepan. Bring to full rolling boil on medium heat, stirring constantly. Boil for 4 minutes or until candy thermometer reaches 234 degrees Farenheit, stirring constantly to prevent scorching. Remove from heat.

Add chocolate and marshmallow creme; stir until completely melted. Add walnuts and vanilla; mix well.

Pour immediately into prepared pans; spread to form even layer in pan. Let stand at room temperate 4 hours or until completely cooled. You can put the fudge in the fridge too if you don't want to leave it out on the counter.

Cut into 1-inch squares. Store in tightly covered container at room temperature. Makes 3 lb. or 40 servings, about two squares each.

Once ready to eat, say a little thanks to my Granny, Mary Mitchell Luman, and ENJOY!

March 2, 2009

Recipe of the Day - Raspberry Custard Pie


This weekend, I got the itch to make a pie. After baking pecan pies all winter, I wanted to try something different, and luckily, I had the March issue of Martha Stewart Living on my coffee table. Inside, I found a delicious recipe for Raspberry Custard Pie. I wasn't happy with the final look of the pie - I believe that I need to buy another pie pan as I feel the one I have doesn't lend itself to holding up a decent crust. However, I think the finished product tastes excellent! The tartness of the berries combined with the smooth,subtle flavor of the homemade custard is a wonderful Springtime combination. Try out the recipe for yourself and welcome the not so distant arrival of Spring into your kitchen with a delicious berry adorned pie!

Why Hello There Spring - Why Don't You Try Some of my Raspberry Custard Pie? Recipe


Equipment Needed
9-inch pie dish
3 Mixing bowls
Whisk
Parchment paper
Pie weights or dried beans
Pastry blender
Measuring cups
Measuring spoons
Cooling Rack

Ingredients
Pâte Brisée (crust):
1 1/4 cups all-purpose flour
1/2 teaspoon salt
1/2 teaspoon sugar
4 ounces (1 stick) cold unsalted butter, cut into small pieces
2 to 4 tablespoons ice water

Raspberry Custard Pie Filling:
1 tablespoons all-purpose flour, plus more for surface
3/4 cup sugar
1 large egg
1 cup heavy cream
3 1/2 cups raspberries, plus more for garnish
1/3 teaspoon salt

Mix flour, salt and sugar in a large mixing bowl. Add softened butter and ice water to mixture and using pastry blender, blend ingredients until fully combined. Shape dough into a disk, wrap in plastic, and refrigerate until firm, about 1 hour (or up to 2 days).

Next, preheat over to 375 degrees. Role pâte brisée to 1/8-inch thickness on a lightly floured surface. Fit into a 9-inch pie dish, and trim edges, leaving a 1-inch overhang. Tuck overhang under so edges are flush with rim, and crimp edges. Prick bottom of dough with a fork. Freeze for 15 minutes. Line dough with parchment and fill with pie weights or dried beans. Bake until crust is light gold and cooked through, 10 to 15 minutes. Let cool on a wire rack.

Reduce over temperature to 350 degrees. Whisk flour and 1/2 cup sugar in a medium bowl. Add egg and cream, and whisk to combine. Toss raspberries, remaining 1/4 cup sugar, and the salt in a medium bowl. Spoon berries into crust, then pour in cream mixture, filling to just below the rim.

Bake until custard is set but still a bit wobbly in the center, about 45 minutes. Let cool in a dish on a wire rack. Cover, and refrigerate for at least 2 hours (or up to 1 day). Garnish with fresh raspberries, and serve cold.

Now enjoy the fruits of your labor!
Related Posts with Thumbnails